

Last Updated: November 1, 2026
Quick Summary
A screen printing press stays accurate and reliable when you clean it daily, check and lubricate moving parts weekly, and re-level and inspect it monthly. Most bad prints trace to neglect such as loose hardware, dried ink, or an unlevel platen, not to age. Follow your manufacturer's manual where it differs from a general schedule.
- Watch for misregistration, uneven ink laydown, and clicking or grinding as early warning signs.
- Clean the platen, flood bar, and squeegee daily before and after each shift.
- Lubricate arms and hinges weekly and check micro-registration knobs for play.
- Re-level the press monthly and confirm registration with a test print.
- Match the cleaner to the ink: plastisol needs cleaning before it cures, water-base before it dries.
Table of Contents
- Why Regular Press Maintenance Protects Your Print Quality
- Daily, Weekly and Monthly Maintenance Schedule by Press Type
- Screen Printing Press Cleaning Tools and Cleaning Products
- Screen Printing Equipment Maintenance Checklist with Pass/Fail Criteria
- Leveling, Lubrication and Press Tune-Up Steps
- Screen Printing Press Troubleshooting for Common Problems
- Booking a Tune-Up or Upgrading Your Press Setup at McLogan
- Frequently Asked Questions
Why Regular Press Maintenance Protects Your Print Quality
The most common reason a press produces bad prints is neglect, not age.
Routine press maintenance keeps prints sharp and downtime low. Watch for three early warning signs: misregistration between runs, uneven ink laydown, and clicking or grinding from the arms and hinges.
If a press has not been checked, cleaned, and lubricated in the last week of production, check it before the next job.
Daily, Weekly and Monthly Maintenance Schedule by Press Type
Press type decides how often each part needs service. A manual tabletop press with a few stations needs different attention than a larger automatic press that runs all day.
Daily (before and after each shift):
- Wipe down the platen, print bed, and flood bar
- Clear ink residue from the squeegee and flood bar
- Check that nothing is loose on the printhead and gate
- Remove lint and dust from the print area
Weekly:
- Clean and lubricate all moving joints, arms, and hinges
- Check micro-registration knobs and locking levers for play
- Inspect squeegee blades for nicks, cuts, or wear
- Confirm that leveling feet sit flat on the surface
Monthly:
- Check springs, bearings, and fasteners for wear or looseness
- Re-level the press and confirm registration on a test print
- Deep-clean the frame and underside of the platen
- Log any problems so you can spot patterns over time
By press type:
- Manual, single-station: Focus on the arm pivot and locking levers, which take the most daily use.
- Manual, multi-station: Check station-to-station alignment weekly, since small shifts add up across stations.
- Automatic: Follow the manufacturer's service intervals in the user manual, and log every service.
Always follow your press manufacturer's manual first. Where this schedule and the manual disagree, the manual wins.
Screen Printing Press Cleaning Tools and Cleaning Products
A press cleaning kit does not need to be large, but every item in it should have a job.
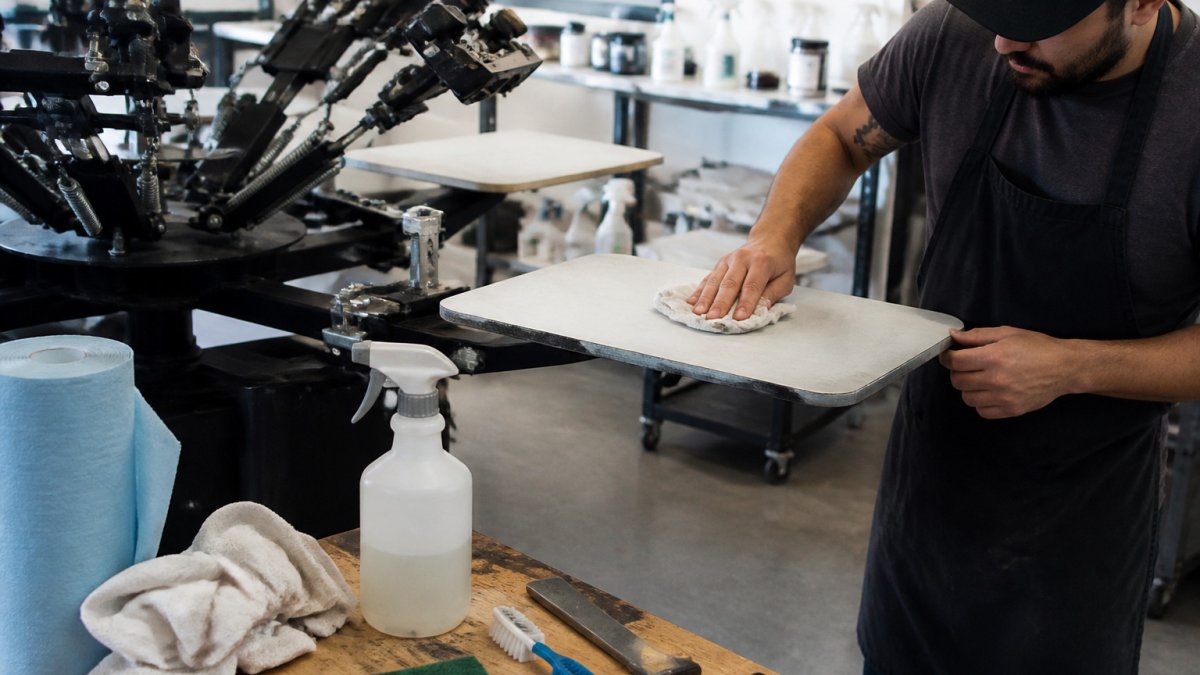
Printer wiping down a manual screen printing platen with a cleaning cloth and spray bottle in a workshop
Wiping: lint-free rags or shop towels.
Scraping: plastic scrapers and spatulas in a few widths.
Applying: a labeled spray bottle for press wash and a small squeeze bottle for lubricant.
Protecting: nitrile gloves, eye protection, and a closed metal container for solvent-soaked rags.
Matching the Cleaner to the Ink and the Press
The right cleaner depends on the ink chemistry, the surface, and the residue you are removing.
- Plastisol ink: plastisol does not dry by evaporation, so it stays workable until cured. Most residue comes off with a press wash or dedicated plastisol cleaner and a rag; the goal is to dissolve the ink film before it cures. Once cured, solvent alone will not lift it, you need a screen opener or dedicated ink remover, often with a soak.
- Water-base ink: water-base ink dries by evaporation, so it sets fast in screens, on flood bars, and in squeegee edges. Clean it promptly with water or a water-base-compatible cleaner; once dry, it needs a stronger remover. Step-by-step instructions for removing ink from a screen after printing walk through the full cleaning sequence. Do not let it sit on a platen overnight.
- Emulsion and tape residue: these need a different chemistry than ink. Emulsion removers and dehazers break down the stencil, not the ink, so keep the two chemistries separate and labeled.
A one-step product can save time when it genuinely handles both ink and emulsion, but read the label for the intended use. The EasiStrip SUPRA One Step Ink Cleaner & Emulsion Remover, for example, is described as dissolving plastisol and water-base ink along with emulsion and tape residue, and its listing states it is low odor, non-flammable, and has no VOCs. View the EasiStrip SUPRA One Step Ink Cleaner & Emulsion Remover to check its listed uses.
Surface Compatibility and Shop Safety
Before any cleaner touches the press, confirm it is approved for that surface. Painted and powder-coated frames, anodized aluminum, and plastic knobs and handles react differently to solvents. Strong solvents can dull a finish, soften a plastic knob, or lift paint at an edge, and once the finish is compromised, the part corrodes faster.
Ventilate the shop whenever you use any chemical, wear nitrile gloves and eye protection, and store solvent-soaked rags in a closed metal container.
Screen Printing Equipment Maintenance Checklist with Pass/Fail Criteria
Use this checklist after each weekly service. Mark each item pass or fail; any fail means fix it before the next run.
Riley Hopkins 250+ Screen Printing Press with XY Micro Registration →
- Arms and hinges: Move smoothly with no grinding or sticking. Fail if the arm binds or drops on its own.
- Registration knobs: Lock firmly with no slipping. Fail if the knob turns under light pressure.
- Platen: Clean, flat, and free of ink build-up. Fail if residue shows under a test print.
- Leveling feet: Sit flat with no rocking. Fail if the press wobbles when you press on a corner.
Keep a written log of pass and fail results. Repeated failures on the same item point to a part that needs replacing.
Leveling, Lubrication and Press Tune-Up Steps
A press that is out of level will print unevenly, even with perfect screens. Use this sequence each month:
- Clear the platen and remove all screens and garments.
- Check level with a bubble level across the platen in both directions.
- Adjust the leveling feet until the platen reads level front to back and side to side.
- Lubricate the pivot points with a light machine oil, wiping away any excess so it does not attract lint.
- Check the arm spring. If the arm feels weak or sluggish, replace the spring. The Riley Hopkins Silver Arm Spring ($8.50) comes with one spring and fits all Riley Hopkins screen printing presses.
- Run a test print to confirm registration.
If you run a Riley Hopkins 250+ with XY micro registration, its locking levers and tilted micros give fine control. Check them during each tune-up: Riley Hopkins 250+ Screen Printing Press with XY Micro Registration.


Screen Printing Press Troubleshooting for Common Problems
Troubleshooting works best in a fixed order: confirm the symptom, isolate the cause, fix the cheapest likely cause first, then re-test with a print. Jumping straight to a part replacement wastes money and often misses the real problem. The table below maps common symptoms to likely causes and the first check to run.
Symptom |
Likely causes (check in this order) |
First check |
|---|---|---|
Registration drifts during a run |
Loose locking levers or micro knobs; worn bearings; platen shift |
Wiggle each locking lever and micro knob under light pressure |
Uneven ink coverage or streaks |
Nicked or worn squeegee blade; clogged flood bar; wrong squeegee durometer |
Inspect the blade edge against a light source |
Arm sticks, drops, or feels heavy |
Weak or stretched arm spring; dry pivot; bent arm |
Lift the arm and feel for binding through the full stroke |
Ink smears on the garment |
Dirty or unlevel platen; wrong off-contact; excessive ink |
Check platen flatness and off-contact gap |
Clicking or grinding noise |
Dry or worn bearing; loose fastener; debris in a joint |
Listen at each joint while cycling the press slowly |
Print looks blurry or doubled |
Loose screen clamp; screen not seated; off-contact too high |
Push on the screen frame while clamped |
Working the Symptoms in Order
Registration drift. Start with the locking levers and micro knobs, loose hardware is the most common and cheapest cause.
Uneven ink coverage. Look at the squeegee blade first.
Arm sticking or dropping. Lift the arm through its full stroke and feel for binding.
Ink smearing. Confirm the platen is clean and level, then check off-contact.
Clicking or grinding. Cycle the press slowly and listen at each joint.
When to Fix It Yourself and When to Call a Technician
Most routine troubleshooting is owner-serviceable: cleaning, lubricating, tightening fasteners, replacing squeegee blades, swapping arm springs, and re-leveling the press.
Call a qualified technician when the problem involves:
- Structural damage, a bent frame, a cracked weld, or a damaged printhead casting. Straightening or welding structural parts without the manufacturer's guidance can compromise the press and void coverage.
- Electrical or pneumatic faults on automatic presses, control boards, sensors, solenoids, and air cylinders. These carry shock and pinch hazards and usually need diagnostic tools and parts the shop does not stock.
- Bearing replacement inside a sealed assembly, if the bearing is pressed into a housing, the removal and reinstall need a press and the right driver, or the housing gets damaged.
- Any repair the manual marks as service-only, the manual is the authority on what is owner-serviceable, and it wins over any general guide, including this one.
A practical rule: if the fix requires a tool you do not own, a part you cannot identify from the manual, or disassembly beyond removing a cover, stop and call a technician.
Many ink-related problems come from the ink itself rather than the press. For guidance, see Choosing Compatible Screen Printing Inks.
Booking a Tune-Up or Upgrading Your Press Setup at McLogan
Some repairs and upgrades are best left to people who know the equipment well. If your press needs more than routine cleaning and adjustment, or you are planning to add stations or a cart, Start with a stable base: the Riley Hopkins Multi-Station Screen Printing Press Cart ($484.95) holds up to 250 lbs of press, ink, and supplies, and has adjustable leveling feet.

Riley Hopkins Multi-Station Screen Printing Press Cart
Keep up your schedule, log every service,
Frequently Asked Questions
How often should you maintain a screen printing press?
Run a quick check at the start or end of every shift, then do a deeper weekly and monthly service. Daily work covers cleaning ink residue from the platen, squeegee and screen frame, and wiping moving parts. Weekly work adds checking fasteners, registration hardware and the print head. Monthly work covers lubrication of pivot points, inspecting springs and leveling the press. Follow the manufacturer's manual for exact service intervals, since they vary by model and by how many prints you run each day.
What should you clean on a screen printing press after each job?
After each job, remove leftover ink from the platen, the squeegee blade and flood bar, and the screen frame edges. Wipe down the registration system so dried ink does not block micro-adjustments. Clean the screen with a cleaner suited to your ink type, and keep solvent away from rubber parts. Dry the platen before the next run so ink does not build up in the surface texture, which can cause uneven prints.
What tools do you need to maintain a screen printing press?
Keep a basic kit on hand: lint-free rags, a spray bottle, a stiff nylon brush, a plastic scraper, a set of hex keys and screwdrivers, a level, and a light machine oil or grease recommended in your manual. For cleaning screens and removing emulsion, a concentrated product such as EasiStrip SUPRA One Step Ink Cleaner & Emulsion Remover is designed for use in a dip tank system and dissolves plastisol and water-base ink in one step. Always follow the label for dilution and ventilation.
What are the most common screen printing press problems?
The most common issues are uneven registration from loose fasteners or worn pivot points, prints that look blotchy because of a platen that is not level, ink that dries on the squeegee and causes streaks, and a press that drifts out of alignment after heavy use. Check each item in your weekly routine, and log repeat problems so you can spot patterns, such as a particular station always needing adjustment after a certain number of prints.


