

Table of Contents
- When to Troubleshoot vs. When to Call a Technician
- Heat Press Not Heating Up: Diagnosis and Fixes
- Heat Press Temperature Troubleshooting: Unstable and Uneven Heat
- Heat Press Pressure Adjustment: Achieving Even Contact
- Why Heat Press Transfers Are Peeling: Prevention and Fixes
- Troubleshooting Heat Press Machine Issues: Power and Control Problems
- Preventive Maintenance and Post-Repair Testing
- Frequently Asked Questions
Last Updated: October 13, 2026
When to Troubleshoot vs. When to Call a Technician
Knowing when to fix a heat press yourself and when to call a professional saves time and money. Some issues are straightforward checks. Others require technical expertise you shouldn't attempt alone.
Stop troubleshooting if you encounter electrical hazards. Exposed wiring, burnt components, or water damage mean the machine needs professional repair. Don't risk electrocution or fire. Similarly, if your heat press is still under warranty, contact the manufacturer before opening it up. DIY repairs void most warranties.
Safe to troubleshoot yourself:
- Power connection issues
- Temperature display problems
- Uneven heat across the platen
- Transfers peeling or not adhering
- Fuse replacement (if you know how)
Call a technician for:
- Heating element failure
- Control box malfunction
- Wiring damage or corrosion
- Pressure mechanism problems
- Thermal fuse replacement (if unsure)
When in doubt, err on the side of caution. A broken heat press costs less than an injury or a fire.
Heat Press Not Heating Up: Diagnosis and Fixes
A heat press that won't heat is often a power or electrical issue, not a broken heating element. Start with the simplest checks first.
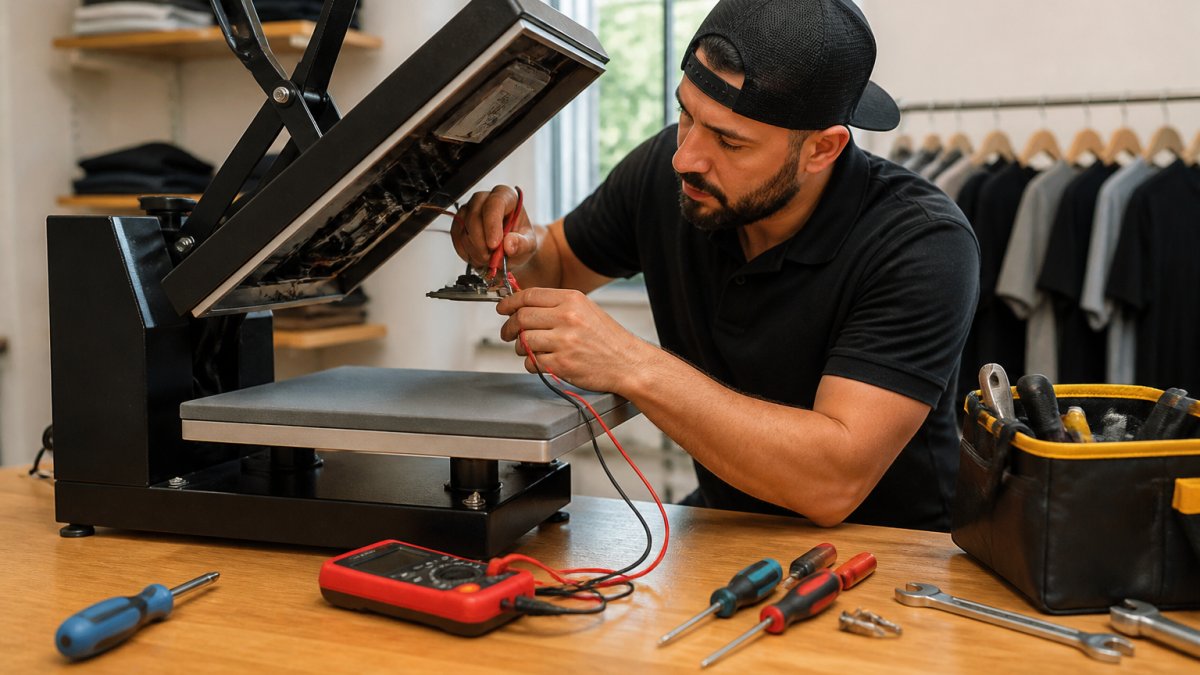
Check Power and Electrical Connections
The first step in heat press troubleshooting is confirming power reaches the machine.
Verify the machine is plugged in and the outlet works. Plug a lamp or phone charger into the same outlet. If that device works, power is reaching the outlet.
Look at the power cord for damage. Cuts, burns, or exposed wires mean the cord needs replacement. Never use a damaged power cord.
Check the power switch. Press it firmly. Listen for a click. Some switches stick or fail silently. If the switch feels loose or makes no sound, it may need replacement.
Power connection checklist:
- Outlet delivers power (test with another device)
- Power cord has no visible damage
- Power switch clicks and feels firm
- All plugs are fully inserted
Test the Heating Element and Fuse
If power reaches the machine but it still won't heat, the heating element or fuse may be faulty.
A blown fuse cuts power to the heating element. Fuses look like small cylinders with metal caps. Open your machine's control box (consult your manual first).
If the fuse looks blown, replace it with an identical one. Fuse specifications matter. Use the wrong amperage and you risk fire or further damage.
The heating element itself may fail. This is the coil that generates heat. If it's broken, the machine won't warm up no matter what you do.
Fuse and heating element checks:
- Locate the fuse in your control box
- Look for blackening, cracks, or loose fit
- Replace with exact same amperage fuse
- If heating element is suspected faulty, contact a technician
Heat Press Temperature Troubleshooting: Unstable and Uneven Heat
Unstable temperature and uneven heat across the platen are common problems. Both affect transfer quality and consistency.
Temperature swings during pressing ruin transfers. One moment the platen reads 350°F. The next it drops to 320°F. This inconsistency causes adhesion failures and peeling.
Uneven heat means the corners of your platen are cooler than the center. A transfer pressed in the corner won't adhere the same way as one in the middle. This creates a quality gap you can't ignore.
Verify Temperature Accuracy with an Infrared Thermometer
Your heat press display may not show the true platen temperature. An infrared thermometer gives you the real reading.
Set your heat press to 350°F and let it sit for 5 minutes. Use an infrared thermometer to check the actual platen temperature.
If the display reads 350°F but the infrared shows 320°F, your display is off by 30 degrees. This explains why transfers fail. You're pressing cooler than you think.
Check multiple spots on the platen. Center, corners, and edges. If the corners read 15-20°F cooler than the center, you have uneven heat distribution.
Infrared thermometer test:
- Set press to target temperature
- Wait 5 minutes for stabilization
- Check center, corners, and edges
- Compare readings to display
- Note any gaps larger than 10°F
Calibrate Your Temperature Readout
If your display is inaccurate, calibration may fix it. Many heat presses have a calibration feature in the settings menu.
Consult your manual for calibration steps. Most machines let you adjust the offset. If your display reads 30°F high, you can dial in a -30°F correction.
Some machines don't offer user calibration. If yours doesn't, contact the manufacturer or a technician. Incorrect temperature readings affect every transfer you make, so fixing this matters.
Address Uneven Heat Distribution Across the Platen
Uneven heat often comes from platen wear or a failing heating element. Older machines develop hot spots and cold zones.
Quick fixes:
- Clean the platen surface (residue blocks heat transfer)
- Replace worn platen covers
- Check platen alignment (misalignment causes pressure gaps)
- Use protective pads to even out pressure
If you press frequently, your platen wears out. Protective pads help. McLogan offers Quick Slip Cover Pad Protectors that reduce platen wear and improve heat distribution. These pads fit both upper and lower platens and help achieve more consistent transfers across the entire surface.

For deeper uneven heat issues, the heating element itself may be failing. This requires professional diagnosis.
Heat Press Pressure Adjustment: Achieving Even Contact
Pressure affects how well transfers stick. Too little and the transfer won't adhere. Too much and you damage the garment or transfer.
Most heat presses have pressure adjustment screws or a lever. Check your manual for the exact location and adjustment method.
Start with manufacturer recommendations. Most machines suggest medium pressure for standard transfers. Test on scrap material first.
If one corner presses harder than another, the platen may be misaligned.
Uneven pressure causes the same problems as uneven heat. Transfers peel from low-pressure areas. Garments wrinkle in high-pressure zones.
Pressure adjustment steps:
Heat Press Rubber Pad For Platen →
- Consult your manual for adjustment location
- Start at manufacturer's recommended setting
- Test on scrap material
- Adjust incrementally (small turns matter)
- Check that top platen sits level
Why Heat Press Transfers Are Peeling: Prevention and Fixes
Peeling transfers are frustrating. The design looks good when it comes off the press, then starts lifting after a few washes.
Peeling happens when the transfer doesn't fully bond to the garment. Temperature, time, and pressure are the usual culprits.
Check Temperature, Time, and Pressure Settings
These three factors work together. Get any one wrong and adhesion fails.
Temperature: Most transfers need 320-360°F. Check your transfer manufacturer's specs. If you're pressing at 300°F, the adhesive won't fully activate. If you're at 380°F, you may damage the transfer or garment.
Time: Pressing too fast doesn't let heat soak into the garment fibers. Most transfers need 10-15 seconds of contact. Check your transfer instructions.
Pressure: Light pressure leaves gaps between transfer and garment. The adhesive can't make full contact. Increase pressure gradually until the transfer bonds firmly.
If all three settings are correct but transfers still peel, suspect a platen problem.
Inspect Platen Condition and Use Protection
A worn or dirty platen prevents good transfer adhesion.
Dirty platen: Lint, adhesive residue, and ink buildup block heat transfer. Clean your platen with a damp cloth after each shift. Wipe away visible debris.
Worn platen: Over time, platens develop grooves and rough spots. These create uneven contact with the garment. A worn platen can't deliver consistent pressure.
Protect your platen with covers. McLogan's Quick Slip Cover Pad Protectors reduce wear and keep your platen smooth. They also improve heat distribution for better adhesion.
For serious platen damage, replacement may be necessary. Check if your machine uses a standard platen size or a custom one.
Platen care checklist:
- Clean after each shift
- Remove adhesive buildup weekly
- Replace covers when worn
- Replace platen if grooved or pitted
Troubleshooting Heat Press Machine Issues: Power and Control Problems
Power and control issues stop production. These problems often point to electrical faults that need careful diagnosis.
Blown Fuses and Thermal Overload Protection
A blown fuse cuts power to the heating circuit. Your machine won't heat and may not power on at all.
Fuses protect the machine from electrical surges. When current spikes, the fuse breaks the circuit. This prevents fire and component damage.
If you replace a fuse and it blows again immediately, don't keep replacing it. Something is drawing too much power. This could be a failing heating element or a short circuit. Call a technician.
Fuse replacement:
- Turn off and unplug the machine
- Locate the fuse holder in the control box
- Remove the blown fuse
- Insert a new fuse of identical amperage
- Plug in and test
Thermal overload protection is a safety feature. If the machine gets too hot, it shuts down automatically. This prevents fire.
Control Box Display and Wiring Faults
A blank or flickering display means the control box isn't getting power or has a loose connection.
Check all connections between the power cord and control box. Look for loose plugs, corroded terminals, or damaged wires. Gently reseat any loose connections.
If the display flickers when you move the power cord, the cord may have internal damage. Replace it.
A completely dead display with no lights at all suggests no power is reaching the control box.
Control box troubleshooting:
- Check all plugs are fully inserted
- Look for corroded or burnt terminals
- Test the power cord with another device
- Verify the outlet works
- If display stays dead, contact a technician
Wiring inside the control box can corrode or loosen. If you see burnt wires or melted insulation, don't attempt repair. This is a fire hazard.
Preventive Maintenance and Post-Repair Testing
Regular maintenance prevents most heat press problems. A few simple steps keep your machine running reliably.
Weekly maintenance:
- Clean the platen
- Check power connections
- Inspect the power cord for damage
- Test temperature accuracy
Monthly maintenance:
- Check all screws and bolts for tightness
- Inspect platen covers for wear
- Test pressure consistency
- Verify fuse condition
After any repair, test thoroughly before returning to production. Press a test garment at your normal settings.
Use heat test strips to verify temperature. These strips change color at specific temperatures. They're cheap and reliable.
Keep a maintenance log. Record cleaning dates, repairs, and any issues. This helps you spot patterns. If you're replacing fuses every month, something deeper is wrong.
Heat press troubleshooting doesn't require advanced skills. Most issues come down to power, temperature, and platen condition.
Frequently Asked Questions
Why is my heat press not heating up?
Your heat press may fail to heat due to a blown fuse, broken wire in the electrical connection, a faulty heating element, or a tripped thermal fuse. Start by checking the power switch and verifying that the outlet is working. If power reaches the control box but the heating element isn't warming, test the fuse and inspect visible wiring for damage. A professional technician should handle component replacement if the heating element itself is defective.
How do I troubleshoot unstable heat press temperature?
Temperature instability often stems from calibration drift, uneven heat distribution across the platen, or a failing heating element. Use an infrared thermometer to verify whether your heat press readout matches actual platen temperature. If readings differ by more than 10°F, recalibrate according to your machine's manual. Uneven heating across the platen may require replacing the heating element or using platen covers to improve heat distribution. Protect your investment with Quick Slip Pad Protectors, which help maintain consistent heat.
What should I do if my heat press transfers keep peeling after pressing?
Transfer peeling usually indicates insufficient heat, pressure, or dwell time. Verify your temperature settings match your transfer type and use an infrared thermometer to confirm the platen is actually reaching the target temperature. Check that you're applying adequate pressure across the entire platen, uneven pressure causes adhesion failure. Ensure your platen surface is clean and protected; a worn or sticky platen reduces transfer quality. Using Teflon platen covers improves heat consistency and prevents sticking.
How do I adjust pressure on a heat press machine?
Most heat presses adjust pressure via a pressure knob or lever on the side of the machine. Start with the manufacturer's recommended setting for your material type, then make small adjustments if transfers aren't adhering properly. Too much pressure can damage delicate fabrics and transfers; too little causes peeling. After each adjustment, test on scrap material before running production. If your press has a pressure gauge, use it to verify consistent force across the entire platen surface.


